Showing posts with label classes. Show all posts

Mar 4, 2016

Things People Say about Art

Crescent Beach Fence 8 x 10"
I've spent years listening to people as they view my paintings. Most of the time, they're great. They say really nice things. They buy my work.

But sometimes, the comments are astounding.

Just last week: "Oh, look at this piece. She copied this. It looks just like [artist x who lives down the road]." (The artist that lives down the road probably copied it from me.)

"Can you explain to me how you painted this? My 10-year-old is a much better artist, and I'd like to know how you did it so I can have him do it too." (I smiled.)

"I'd like to take class with you. I love your paintings. I've only painted twice, but I can do much better than your work over there." (The person never signed up for a class.)

It seems that many people just don't know or care what they say. They're being honest. But really rude.

No problem. I understand. I just come away with a great story and have a good laugh.

Mar 11, 2015

Ready, Set, Action: On Location with a Film Crew

Plein air painting on St. Augustine Beach
Plein Air Painting on St. Augustine Beach
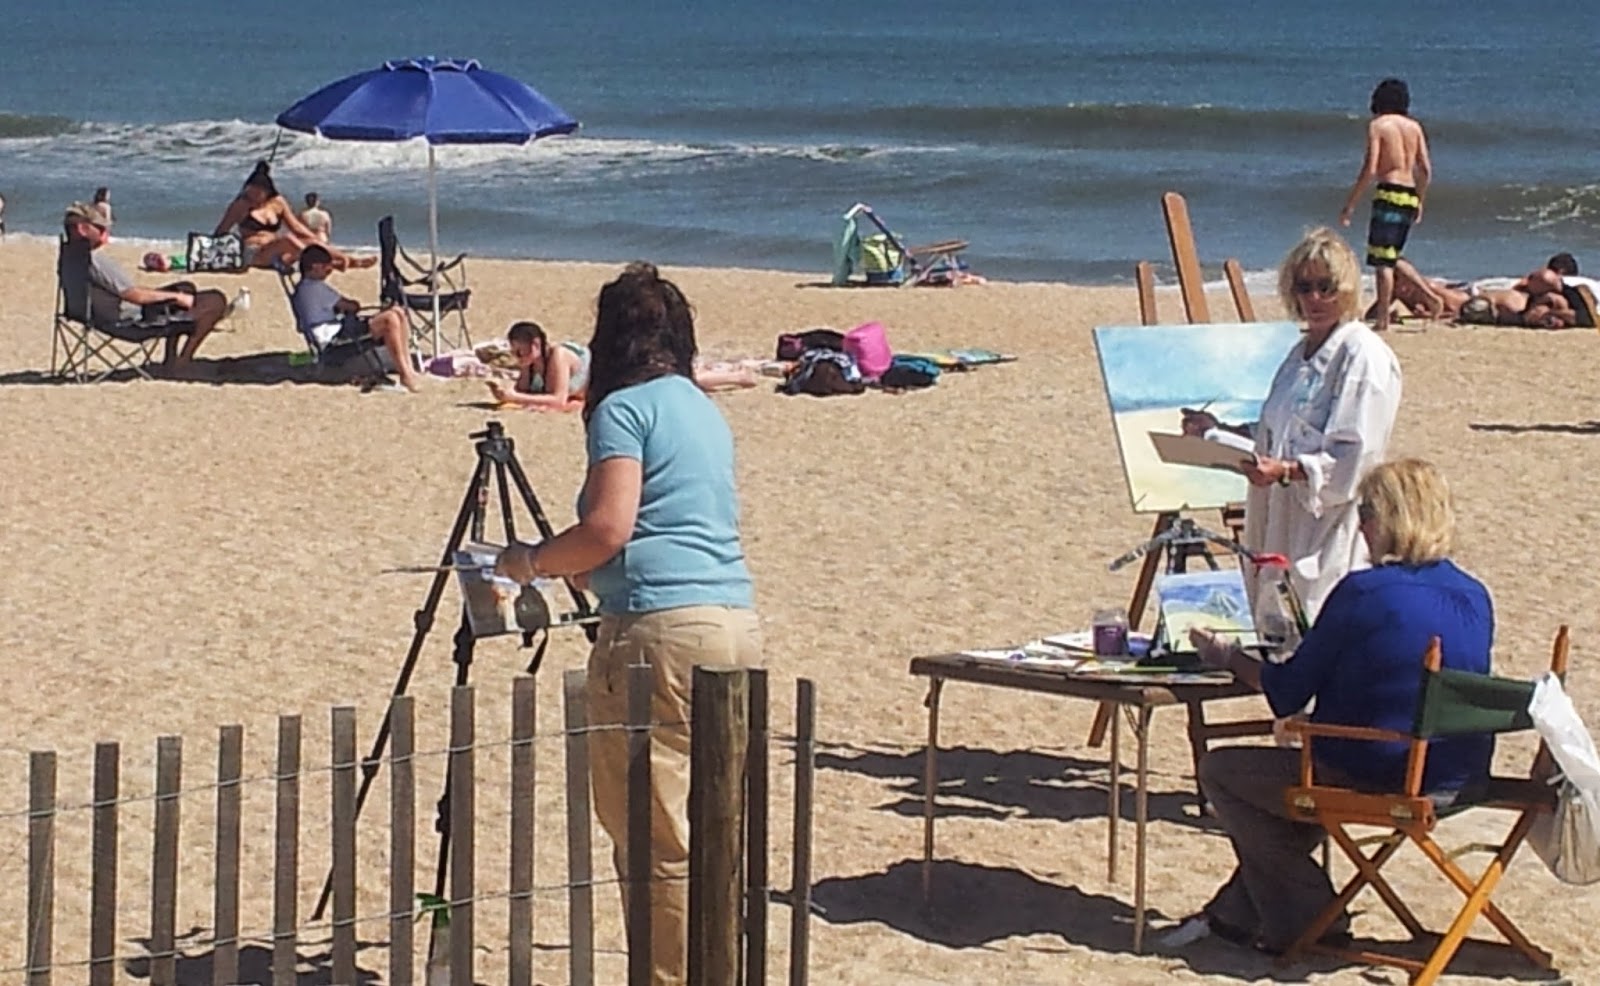
Here are a few photos from a very special plein air painting session I taught yesterday. Special, because we were met on location by a film crew taping a promotional video. They met us on the beach to film us -- me, Sheree, Nancy, and Ellen -- painting on the beach.

The weather couldn't have been better. As luck would have it, the fog had just lifted and it turned out to be one of the first beautiful warm days of the year. The sunshine drew the sunbathers out - they were busy soaking up the rays. We painted that deep blue umbrella, seagulls, and people playing by the waves.

Close-up of Mary Hubley doing a quick study of the beach
Close-up of my quick study of the beach
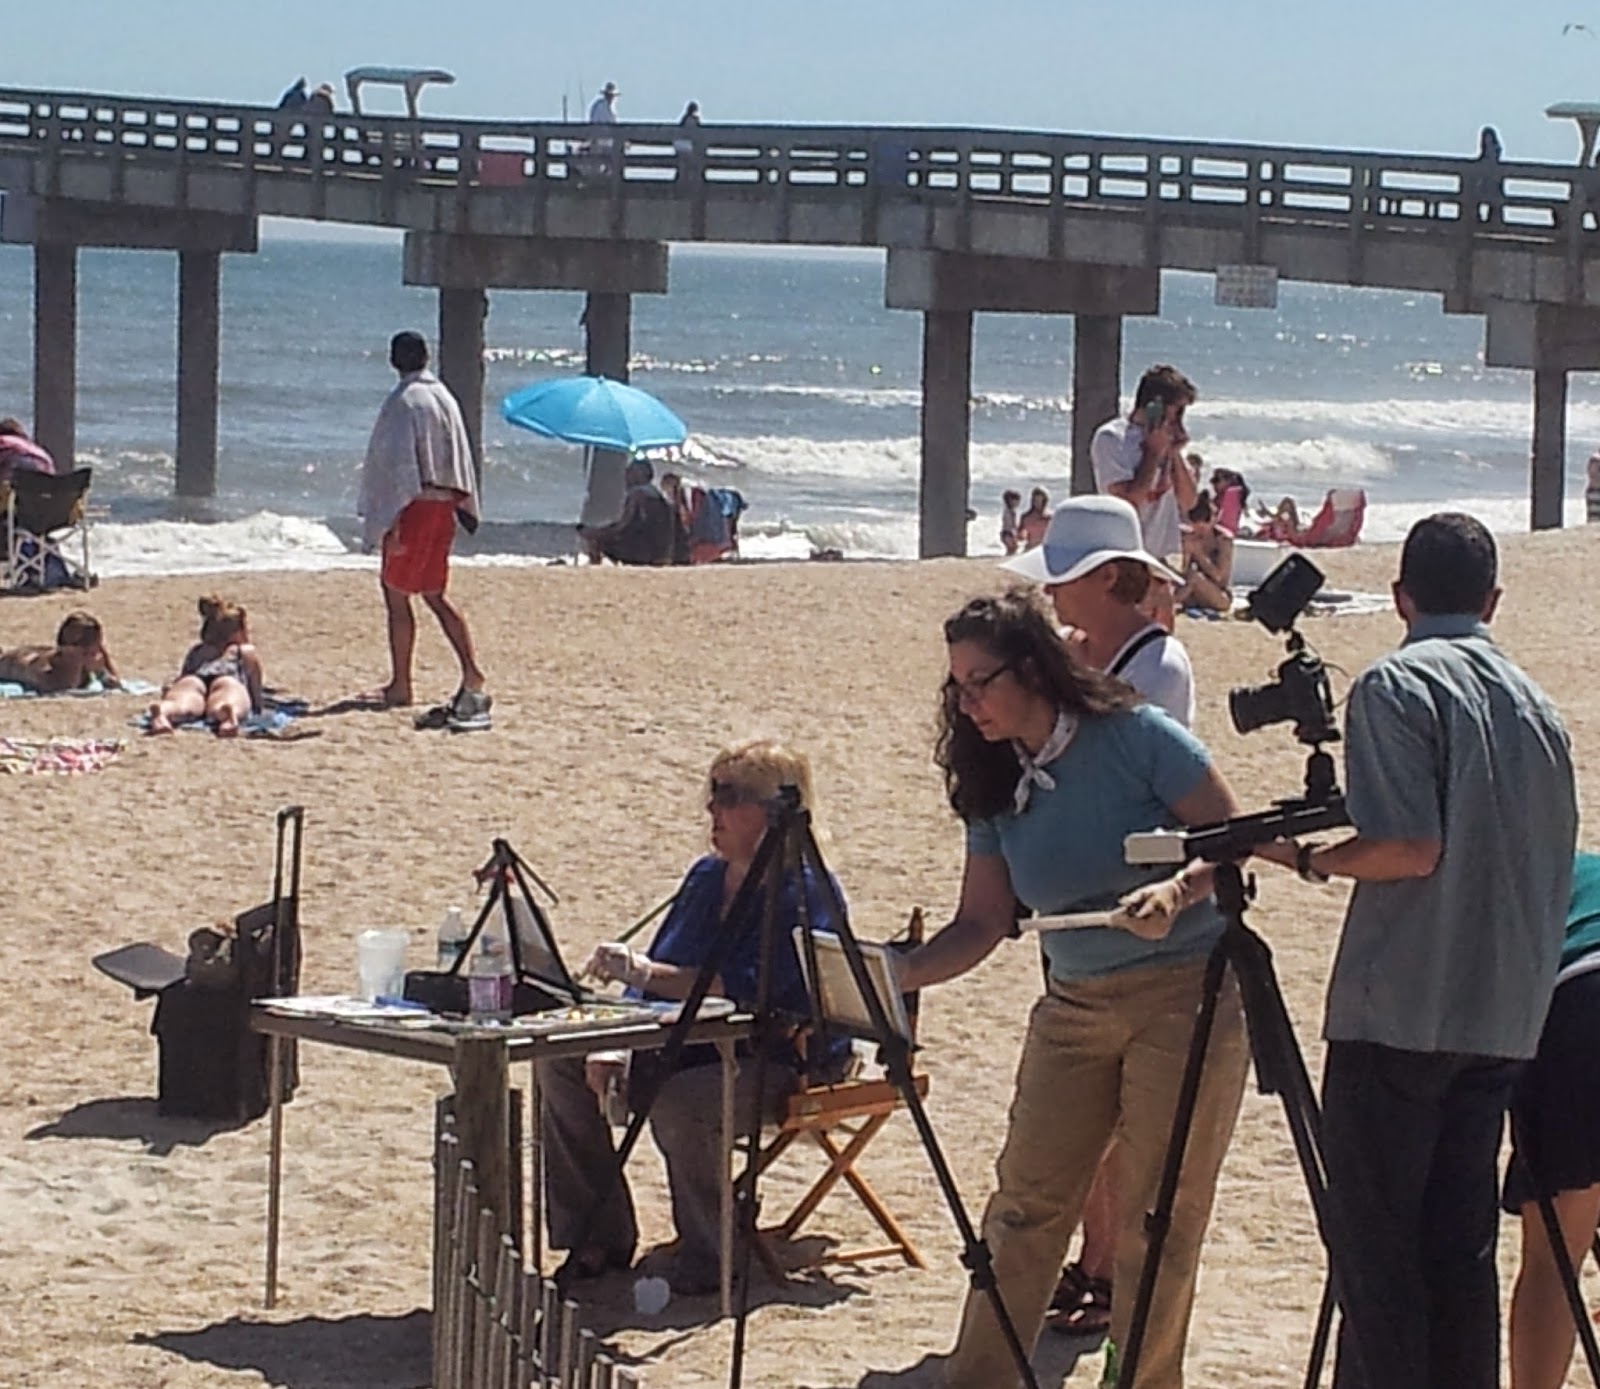
The cameras are at the right, taping us as we're painting. See the Beach pier in back of us
The cameras are at the right, taping us as we're painting. See the Beach pier in back of us.
As we painted, we moved, we stopped, and we started on queue from the filmographers. They took views of us as a group, with the luscious blue sky and bright beach backdrop. Then they moved in for some closeups of my hand adding paint to the canvas, scanning out to the scene I was capturing in front of me. Eventually, the film is intended to be part of a promotional video for the St. Johns County Cultural Center.

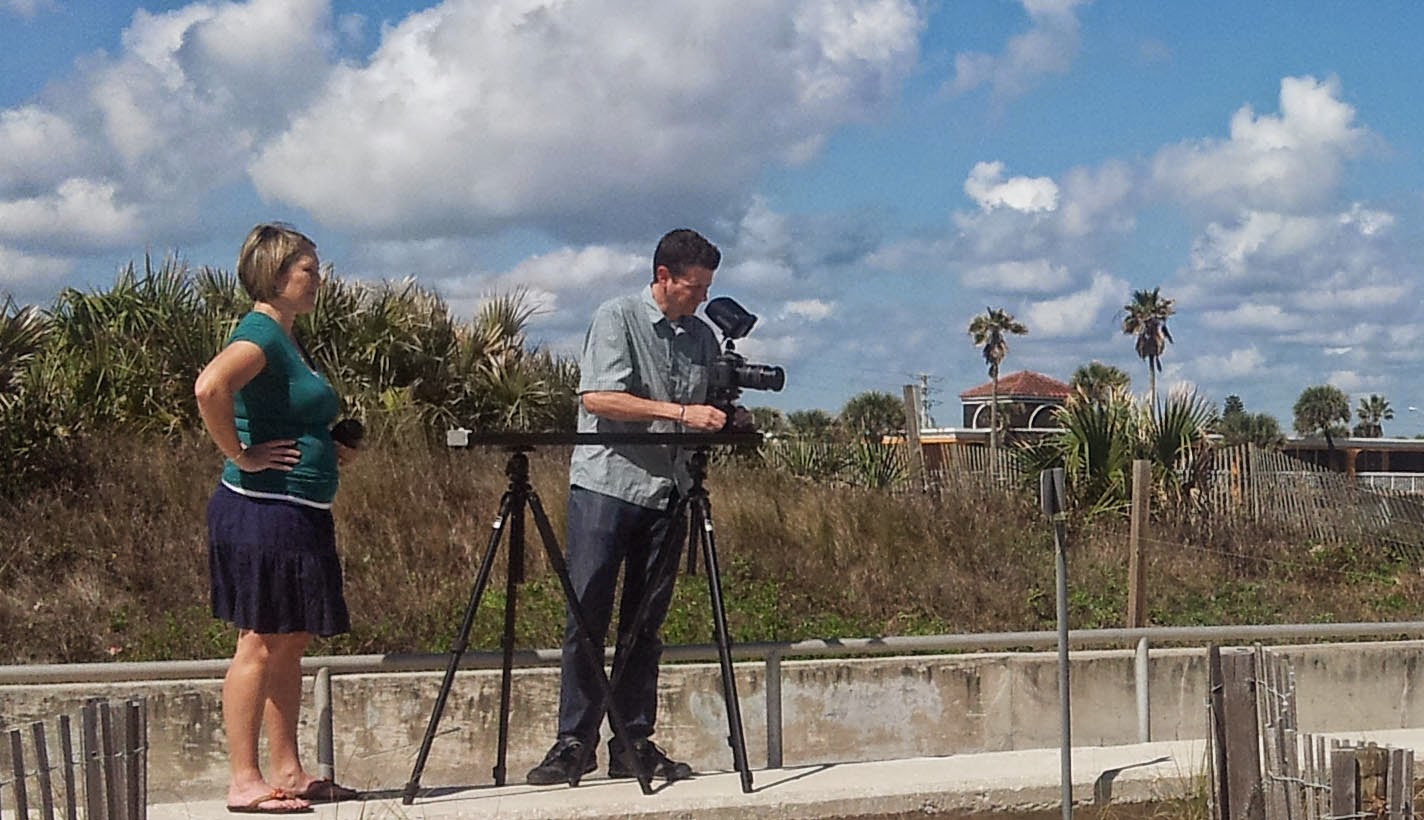
Janice and Donald Jones, our videographers from CycleHereMedia
It was fun! Thanks so much, Janice and Donald Jones, our videographers from CycleHereMedia! Hope the day's filming makes it to the final cut!

--Mary Hubley
www.maryhubley.com

Nov 27, 2014

Painting Workshop in Wisconsin

Wisconsin Painting Workshop - Student Work October 2014.
Photo of original scene


Painting Fall Colors

Last month, I gave a Fall workshop in Wisconsin, where trees broke all the rules. I drove from the airport overcome by vivid autumn colors. They were ablaze. I was overwhelmed. Too much yellow! Too much orange!

I love trees in chaos. But chaos is hard to translate onto the canvas. Too much intensity means that nothing stands out. If nothing stands out, a painting can be, well, undramatic.

Focus on a Single Object


The next day, I gathered my students and found a spot at the edge of a rural road for us to set up, right in front of this lone yellow tree. This was a subject that was approachable. Against a dark background, that little tree pops. If the trees in the background had been the same brightness, this tree would not have been the star.

By framing this little beauty in darker color, it became the drama queen.


-- Mary Hubley
www.maryhubley.com


Nov 10, 2014

Painting Workshop in St. Augustine

Painting at the Fatio House in St. Augustine Florida
A beautiful day in November! My painting workshop was held at the Fatio House in downtown St. Augustine, in a large garden surrounded by 18th century buildings. Here, I'm working with my workshop students as they're working their way through their paintings.

Second painting of the day! Painting Workshop


I generally do a quick demo for my students in a workshop, showing them how do do the underpainting and then applying blocks of color. Then, I move between them as they're working, offering hints and suggestions.

At the end of this day, we walked over to GNG Gallery, which is just around the corner, and took these photos of the day's work:

Painting workshop with Mary Hubley


--Mary Hubley

Oct 16, 2014

Secrets to Painting Palm Trees

Palm Trees on Blue by Mary Hubley artist
Palm Trees on Blue (c) Mary Hubley

Palm Tree Paintings


These two little lovelies are just outside the studio where I teach painting classes (The Art Studio in St. Augustine Beach, Florida). These sabal palms are unsuspecting models for my art students.

On Painting Palm Trees

They're about the worst models I've ever dealt with. They're unruly, weird, and unforgiving. Kind of like the Twiggy of the tree world, palms look like shaggy lollypops rather than "real" trees. But we soldier through them, because it's all we have.
  • Tell yourself they're not really trees at all. Treat them like they're merely shapes, with shapes within shapes within shapes.
  • Not all palm trees are equal. Different varieties - sabal, fan, alexander, date, royal - look different. You can't figure one out and be able to paint all of them the same way.
  • Start. First paint the shape -- lollypop.
  • Continue. Paint darks and lights. Set apart a few main branchie-leaf-things. Finish with a few long, thin lines to detail the leaves and trunk. 
  • Back-paint around the leaves with the background sky.
  • Be patient. It took me a few years to really get comfortable painting palms. They can take much more time to do than other trees, especially at the beginning.

Genre: Landscape
Painting Name: Palm Trees on Blue
Size: 10" x 8"
Media: Oil on Canvas


-- Mary Hubley

Sep 14, 2014

Sunflowers as Painting Subjects

Painting of sunflowers
Sunflowers for Sunday (c) Mary Hubley

Paintings of Sunflowers

I started this painting with a light background, but found that they just didn't pop enough. Sunflowers are powerful, strong creatures, and I needed to give them more definition. The answer: I darkened the background and now the sunflowers stand out.


Van Gogh Sunflowers
Van Gogh Sunflowers

Inspiration of Van Gogh

Growing up near the Philadelphia Museum of Art, I would spend hours in the impressionist exhibit, and in front of a particular Van Gogh Sunflower painting. Van Gogh's painting has an intense light blue background, and surprisingly less intense colors for the yellows in the flowers. This makes the background stand out rather than the flowers. However, the effect makes the flowers soft.


Student's Paintings of Sunflowers

To the right are some of my student's sunflower paintings. I picked up the bouquet on Sunday morning at the market, and used it all week as the still life subject for both my painting and drawing classes.


These paintings were the result after two hours of painting sunflowers.


Genre: Still Life
Painting Name: Sunflowers for Sunday
Size: 16" x 20"
Media: Oil on Canvas


-- Mary Hubley


Feb 21, 2014

Drawing Positive Space versus Negative Space

Positive and Negative Space - (c) Mary Hubley

Negative Space is the Shape Around Your Subject

One of the best tricks to improving your drawing practice is to figure out the difference between positive space and negative space.

Positive space is the actual object. In this image of two cats above, the positive space is the two cats (on the left). Negative space is the area around the object--the blank area around those cats (on the right).


Not every art student "gets it" at first, but those drawing students who catch on seem to magically improve their drawing skills overnight. Successful negative space artists see the space around an object and can perceive how to draw the shapes between the objects.

Look for the shapes around your subject (c) Mary Hubley

The goal in learning negative space is to find the area around and in between the object. 

In the example of our cats, draw the holes between the cats - this kind of looks like a thin candle with a long flame. Draw the triangle that the tail makes, and the triangle underneath the cats. See the shapes and draw those. Don't concentrate on drawing cats; rather, concentrate on the shape the negative space around the cats make.

My drawing students who are getting this concept are creating images that are well proportioned. They are actually drawing objects correctly for the first time in their lives.


Feb 7, 2014

Right Side of the Brain and the Classroom

I've just started teaching a new series of drawing classes for adults. While my flyer invited all levels of students, every one of my new "kids" turned out to be new to drawing. Most said they couldn't draw a stick figure. Most were afraid, but brave. Everyone showed up the first night, as promised, sharpened pencils in hand.

It's great to have everyone starting from scratch, because I can hone in on the needs of the new artist. And, I get to teach from the classic Betty Edwards' "Drawing on the Right Side of the Brain" concepts. In an nutshell, Edwards shows how to see a subject better by moving from the familiar, restless, noisy left brain to the quiet happy solitude of the right brain.
"You have two brains: a left and a right. Modern brain scientists now know that your left brain is your verbal and rational brain; it thinks serially and reduces its thoughts to numbers, letters, and words.... Your right brain is your non-verbal and intuitive brain; it thinks in patterns, or pictures, composed of 'whole things,' and does not comprehend reductions, either numbers, letters, or words." -- Betty Edwards
It took a while, but after we got started doing right-brain drawing exercises, most of the students "got it". Amazing for me to see the faces of the women light up as they realized how well they did after they figured out how to switch brain sides. Not everyone grasped the concepts, though; so it's not for everyone.

They all left with smiles, and great enthusiasm. I'm looking forward to continuing teaching this group of happy new artists.

 --Mary Hubley

Jan 24, 2014

Drawing Class Materials

As I work with some of my new students to gather their class materials, I'm finding some great supplies with great price tags in our local stores. Michaels has everything you need to take a drawing class, and surprisingly, for a decent class experience you can spend under $10 for my 6-week session.

BEST BET: The best buy so far is the great Artist's Loft Sketching and Drawing set - it comes with all the hard and soft-leaded pencils you'll ever want (from 6B to 2H), a kneaded eraser, a vinyl eraser, a sharpener, tortillion and stumps. All for just $4.99.

Other than this ready-made drawing class kit, all my students need is a sketchpad or two, and perhaps a few colored pencils.


DRAWING CLASS: I still have some spots open for my drawing class, which runs from February 6 through March 13. Contact me if you're interested in having fun and drawing!

--Mary Hubley
www.maryhubley.com
mary@maryhubley.com